
My current project is WW2 Europe. This is partially because most of the non-40k specific terrain I have is from my previous SAGA efforts, and consists largely of fields, woodland, river, and some bogs, most of which should be completely reusable for this theatre as well. The grub huts and long houses however, probably won't be quite as suitable. To remedy this, I decided I need a small farm as I have plans to work through the scenarios in the Battleground Europe Bolt Action theatre book. I looked at various options, including scratchbuilding one, but considering that I hadn't scratch built anything larger than a fence since my teenage years I felt that I should buy an MDF one and detail it instead.
I decided on one of Sarissa's English timber framed farmhouses. I felt that the style of building was fairly common throughout Europe, not just England, and with a few tweaks and a bit of hand waving it could pass for pretty much anywhere on the western front. I've also frequently had daydreams about an ECW project so I may as well have one eye on multitasking the building in the future. Anyway, I bought one for the paltry sum of £15 (they can be found here; https://www.sarissa-precision.com/Farmhouse/p1603368_14211456.aspx) and set to work. I removed the paper from a load of foamboard, clad the house in the resulting foam sheet, and set to work with ruler, coffee stirrers stolen en masse from my local mega-corp coffee house, and a tube of gel superglue.


I tried to keep a lot of the original details, such as the brickwork, from being lost under the cladding by scribing it into the foam, but reduced the number of timbers because it was making it look a bit crowded. I also decided not to replicate the curved timbering, not only because it would be a complete pain in the arse to do, but also because curved timbering is actually a pretty rare feature (but mainly because it would be a pain in the arse). I almost replaced it with some diagonal beams, but decided not to for the sake of a simple life.
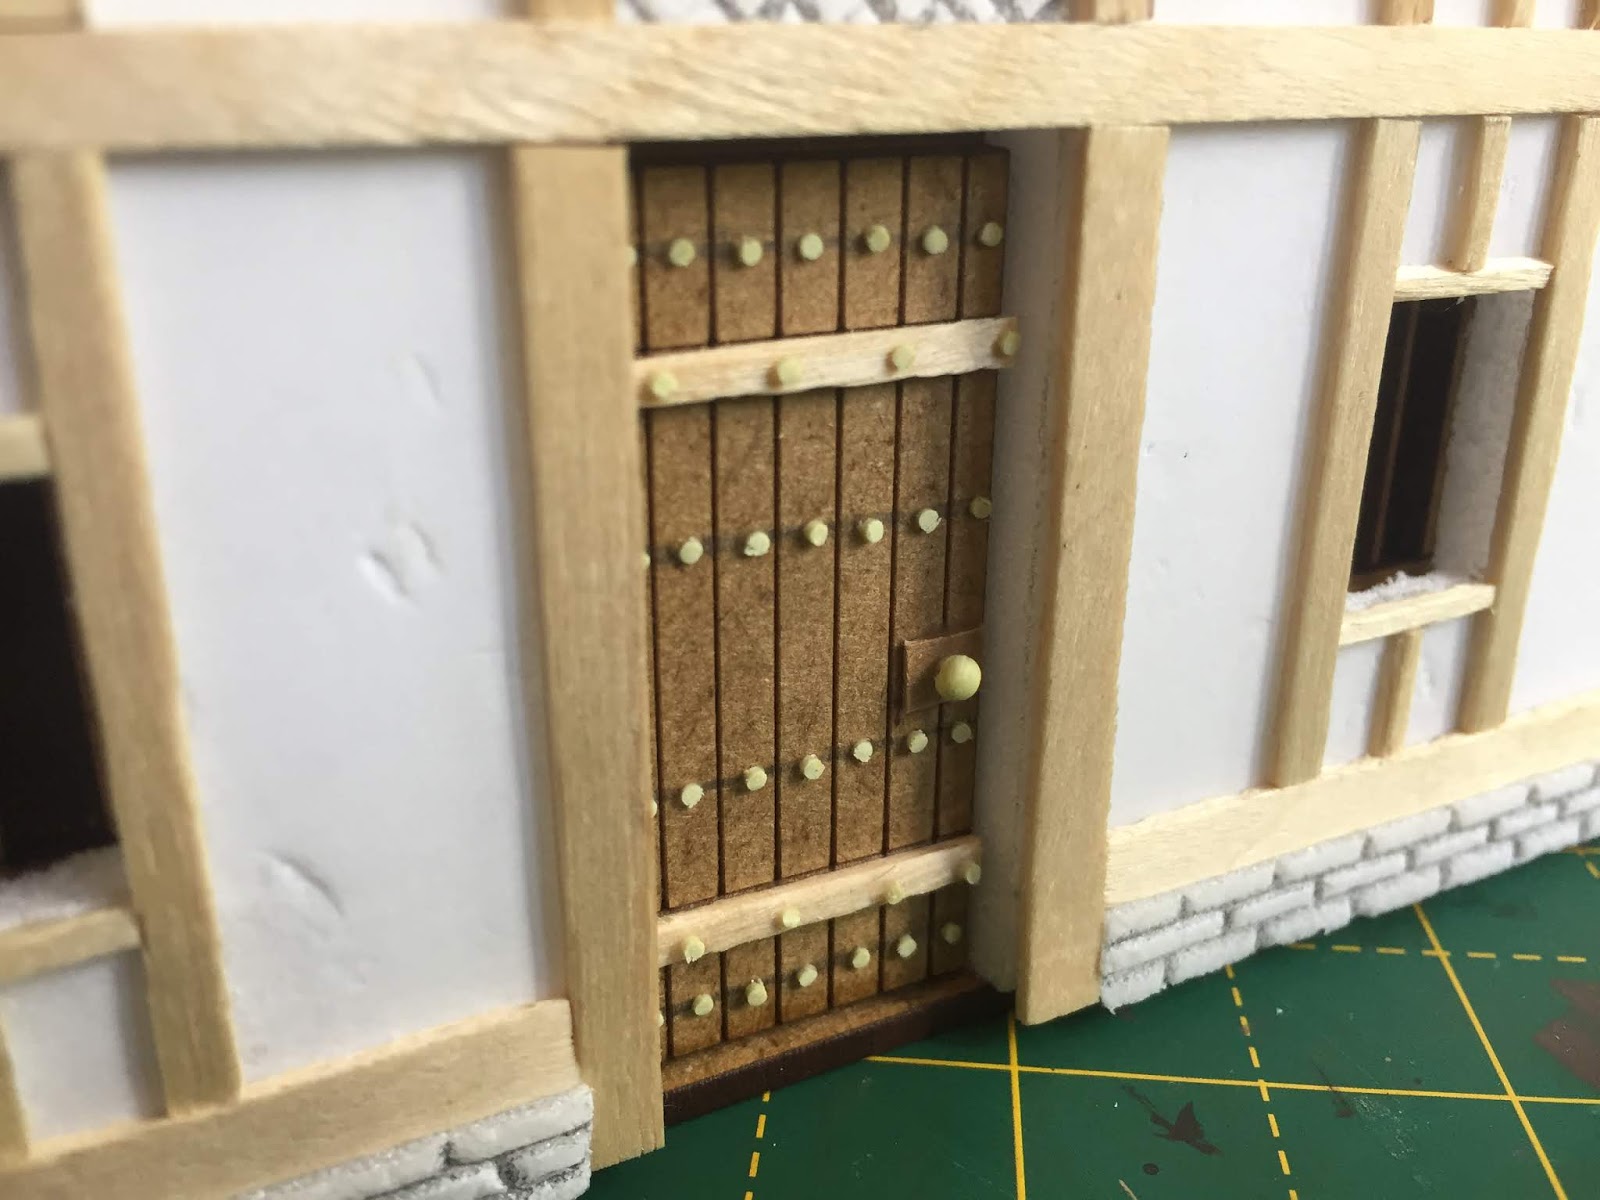
In an attempt to get as many different levels or layers into the facade as I could, I decided that the doors needed to be brought forwards a bit as they sat very deep, and at the same level as the windows, so a few small offcuts of wood were used to bring them outwards a bit.
 |
| My accidental attempt a noir-ish chiaroscuro effect. |
This fugly solution does start to preclude any detailing inside the building, but I've decided against going all out on the interior anyway. (This is partly because I am sure that the Mrs would start making loud and derogatory comments about why I was playing with a dolls house. She's delightful like that, is the Mrs.) I'd rather have it empty and playable than littered with chairs and suchlike, and there is no way on earth I am crazy enough to start building stairs to fit inside. Not yet, anyway.
My first attempt at tiling the roof using individually cut shingles looked cartoony as the tiles were too big, so I ripped them off and started again with ones half the size. There's about 700 of the buggers on there, and it took a full days work to apply them all, but I'm pleased with the outcome.

This lefts me with the smaller details to sort out, like door handles and chimney pots before painting can begin. I made these out of milliput and attached them with superglue.

I decided against window ledges as I didn't like the first one I did, but in hindsight I wish I had lined the windows as the texture of the foamboard shows through and doesn't look very nice, particularly as the windows are so deep due to the cladding. Anyway, it was paint time, and it took me a couple of evenings to complete, and then an hour or so to put in some windows made from a laminated pouch with nothing in it, and laminated into a clear sheet. These don't really show as well as I would like, again due to the depth of the windows, so this is something I will have to address on the next build.


Here's the paint recipe, so hopefully I can replicate it at a later date.
Infill panels: VMC dark sand and highlighted with VMC pale sand, with a touch of army painter soft tone around the edges of the panels and highlighted again to soften the edges.
Brick work: 60/40 VMC chocolate brown / CIT evil sunz scarlet, drybrushed with CIT deathclaw brown, and a wash of VMC pale sand between the bricks.
Roof: Galeria black, followed by 70/30 VMC german grey / CIT evil sunz scarlet, and varying drybrushes of CIT brown, VMC green grey, VMC german field grey, and a final highlight of 60/40 CIT deathclaw brown.
Timber: VMC german grey, drybrush VMC beige brown, and the doors have a final drybrush of 60/40 VMC beige brown and VMC pale sand.
I learned a lot from this project, and I hope to carry those things forwards into my next build. I'm looking at scratchbuilding a shed, and modifying a sarissa timber barn in much the same manner. I also have my eye on the large Sarissa village church, and am considering scribing the stonework into DAS clay to avoid cladding the whole thing in foamboard and adding even more width and screwing up the set of the roof, but it seems like it might be a bigger job than I want. I certainly want to get the farm finished before I start anything mad, as well as about 24 feet of walls and hedgerows. I will probably pick up a few Sarissa bits when I go to Broadside next month, and my plans always end up fluid anyway, so god knows. Whilst it has provided many hours of amusement for £15, I'm still quite glad to get this farmhouse off my table and get back to painting Germans for a little while!
No comments:
Post a Comment