Saturday, 11 November 2023

Small church


This little fella is based on the timeline small Norman church found here: https://www.timelineminiatures.co.uk/product/28mm-scale-buildings-28mm-small-norman-church

Timeline do a whole load of fairly bare-bones but really affordable kits that are perfect for tarting up like this.

Inspired by a Facebook post by Geoff over at Purple Lion Creations, I decided to clad it in Das for that stonework look. Mine's not as good as Geoff's work, but it works better for me than just textured or, god forbid, just painted mdf. It's a lot more work, but nothing worth doing is ever easy. 

First job is to roll the Das to about 2mm thickness. A rolling pin and greaseproof paper are your friends here. Then pva a wall of your choice and glue the Das to it. I then used a silicon clay shaper to create the stonework. Geoff uses a metal tool, and I did do one face of the tower with the metal dental tool, and it does look better, but christ it took time, so I went for the clay shaper as a speedier alternative.


I left some patches blank and textured them afterwards with filler, figuring it would look like patches of render. I'm not sure it worked, and if I'm entirely honest it was more an attempt to have to a few less stones, so in future I shall skip this entirely.


I textured the interior, and laid down some scored card to show flagstones or tiles or what have you.

I wanted this to do double duty, as a ww2 piece as well as a dark age / medievil piece, so I made two rooves. One thatched (Das again) and one tiled. And then because I'm a damn masochist, I decided I needed to be able to have a church with a spire too, so I used some epvc and plastic tubes to make one. It was a slapdash affair, lacking much detail and any form of verisimilitude to any spire known to man nor deity, but somehow it fits perfectly, does the job of representing a spire, and doesn't look like complete and utter crap, so I'm taking the win.


It stayed like this for ages, because I got sidetracked playing with Das. I'll show the results of that some other time.

I've just about finished painting the Dark Age'y version, and it's looking fairly alright, I think. It's a bit representational, and would give anyone concerned with strict historical accuracy the absolute heebie-jeebies, but I care not a jot. I come from a Warhammer background, with all the egregious borrowing from disparate periods that implies, along a certain degree of cartoonishness, and I shall not apologise for that. I'm probably going to come full circle and use the earlier stuff for fantasy gaming again at some point, so generic and repurposable is the order of the day. Here's some more photos:


I have to thank Geoff from Purple Lion Creations once again for being so generous with his knowledge on Facebook. He makes wonderful things. Go check him out.

More medievil and ww2 Normandy terrain is currently on the workbench, and I'll endeavour to post some pics of that when it's done, as well.


Saturday, 21 October 2023

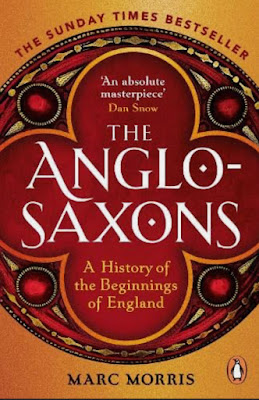
Book Review -- The Anglo Saxons: A History of the Beginnings of England. - Marc Morris


This is going to be the swiftest review ever.

Does what it says on the tin. Relies pretty much entirely on the venerable Bede, Asser's 'Life of Alfred', the Anglo-Saxon chronicle, and the lives of St Dunstan and Aethelwold for its source material, and takes the big events for its narrative and leaves the detail.

Successful at drawing the thread of history through the rulers.

Not saying it's a waste of time. It's just workmanlike and a typical, perhaps somewhat old fashioned, history in the way that's it's basically a readable timeline of nobility. If that's what you want, that's what this is. Well written and readable.

Sunday, 15 October 2023

Hedges tutorial.

 I recently made some modular hedges for various games, primarily Chain of Command, but they'll see use in my Dark Age and ECW games (when that project finally gets off the ground. Some buildings have appeared, but they're not ready to show off yet). I posted some pics of them on the Bolt Action Terrain Makers facebook group, and they got a ton of interest. Quite why, I don't know. There's much more impressive stuff on there that deserves the attention more, but the masses are fickle and enjoy a good hedge, apparently. Tutorials were asked for, so here they are.

I made three types, you can have photo tutorials for two of them, and a description of the other one because I haven't got pics.


The first type is really simple and cheap to make. Low hedges / bushes.

They are made from reconsituted chip foam. I get mine from ebay here: https://www.ebay.co.uk/itm/352161463785?mkcid=16&mkevt=1&mkrid=711-127632-2357-0&ssspo=JNeTN5AqTI6&sssrc=4429486&ssuid=uQAQ4z_8RJ2&var=&widget_ver=artemis&media=COPY

I get the samples, which are 99p for something roughly A4 sized. It comes in a very neat cut slab, so I rip it in half across the face, ending up with two flat faces and a rough and knobbly top. Then I rip that into roughly the sized pieces I want. It ends up looking like this:


I then spray it (and my fingers) brown with the cheapest brown spraypaint I can find. The foam doesn't melt to aerosols like some others do, so go nuts. Once that is dry, which can take a while, I coat it in spray adhesive. Don't use spray adhesives from DIY stores. They're thick and stringy and will ruin your terrain. Use stuff like the 3m spray adhesive (https://amzn.eu/d/cxEbjUo) which is good but expensive, or the spray mount from Hobbycraft (https://www.hobbycraft.co.uk/repositionable-adhesive-spray-400ml/6335741000.html) which is cheaper. I'd advise avoiding the one described as movable, as it doesn't give a very good hold. Quickly, before the glue dries, give them a good covering of your favourite flavour of fine turf flock from Jervis Countryside Scenics. Your foliage mixture of choice will be fine, though. I hear good things about noch, for instance.

Leave it a day, then seal with your favourite scenic cement (I use a mix of 25% yacht varnish, 25%PVA, and 50% water in a £2 spray bottle from the garden department of B&Q, but you can use Mod Podge or Woodland Scenics cement if you like throwing your money away instead of spending 5 minutes mixing your own.)  

No basing needed as the foam sits nice and flat.


Type two hedges require some rubberised horsehair. Again, ebay is your friend. The grey stuff works better than the rubberised coconut fibre, but it's a bit of a crapshoot which you'll recieve from the ebay sellers. Ultimately it doesn't really matter as they both work.

Start off with a 1 1/2" x 6" strip of foamcore, and bevel the edges. This is your base. You'd think it would warp, but it doesn't. Don't ask me why. I'm as surprised this worked as you are. Anyway, paint it with a mix of cheap brown acrylic and PVA to seal the foam edges because these buggers are going to get spray painted later.


If they do warp at this point, paint the back with the same mixture when they're dry and they should go back to their original shape.

I got fancy, and hot-glued on some woodland scenics bases from their tree armatures, because I wanted to be able to slot in trees if I wanted, but this is entirely optional. If you do this, make sure to mark the underside of the bases with an x where there is an armature slot, because they are surprisingly easy to lose in the foliage.


Next I took a pair of scissors to the rubberised horsehair mats and cut into strips of the height and length you want. Then put a squiggle of hot glue on the strips and glue the horsehair down. You will burn your fingers here. Just sayin'. Keeping a 28mm figure handy to guage the height is useful.


You can mix it up with some chip foam if you like. Whatever.


Then follow the same steps for spray painting, spray adhesive, flock, and sealing. Bob's your mother's brother.


The last type is the bocage style with a mound under the hedges. I made these ages ago before I started photographing my process, but basically it's the same theory as type 2. Make some foamboard bases, this time 2" in width, but also make some foamboard strips 1" width. Pile two thinner ones on top of the thicker and secure them hot glue. At this point, you'll need to smother them in either sculptamold or modelling compound from LGGS. Same stuff. Form them into nice mounds and let them dry before hitting them with brown acrylic. Your table will now look like it's covered in large, very regularly shaped turds. Take a moment to consider what you are doing with your life.

The keener amongst you may want to add rocks and roots and other details, or bases for woodland scenics tree armatures like I did above, or magnets, or anything else you desire.

From this point on it's exactly the same steps as type 2 hedges; hot glue on rubberised horsehair, burn fingers repeatedly, spray brown, spray glue, Jervis fine turf, seal.


So there you are. Loads of fairly cheap modular hedges. Your biggest expense here is probably going to be the spray adhesive, but it's worth it for the convenience. About 25 feet of type 2 and 3 should probably be just enough for a 6x4, fairly dense bocage table. 


I aint'nt dead.

 Hello again, yawning void of readership.

I'm going to try and return to blogging my games and activities again for a bit of accountability, and for the sake of the record. So here's a quick photo dump of a couple of first attempts at new games. First off, What a Tanker, in which a Sherman Firefly lay in wait for a Tiger I in an orchard, but came out in the losing side of things.


More happened. This was a three player game, all v all, with myself  in charge of the Tiger. There were two panzers taking shots at my rear, controlled by Doug, while Chris controlled the firefly. We had no idea the tiger would be strong enough to sweep all before it, though, and I felt like a swine playing it. I was rolling obscenely well, too. This was one of my armour rolls, and I was rolling like this for pretty much the whole game.


 I like WaT, nice and quick, and ideal for multiplayer, so I'm going to paint up a few more tanks and find some more victi... opponents.

Next up, was our first try of Blood Eagle from Ministry of Gentlemanly warfare. A viking raid on a surprisingly well defended little settlement. We didn't use any complications or fancy scenarios as we just wanted to get a feel for the ruleset.


Blood Eagle is a nice little game. Fast and straightforward. From the first play I'd say forces need to be evenly matched in terms of numbers for a straight up fight such as this. I'm looking forward to using the toolbox to build some interesting scenarios, and expanding my dark age terrain.

That's it. Short and sweet, but the seal has been broken. I have a CoC campaign nearly ready to roll, some dropzone commander, and a few other projects in the pipeline, so hopefully more will be upcoming soon.


Friday, 15 May 2020

Kingdom of Strathclyde warband


      "The heroes went to Cattraeth in marshalled array, and with shout of war,
      With powerful steeds, and dark brown harness, and with shields,
      With uplifted javelins, and piercing lances,
      With glittering mail, and with swords."
                                                                                                                 - Y Gododin


This is what I've been up to since the start of lockdown. 33 dark age cavalry to comprise a complete six point warband for SAGA. All figures are Gripping Beast. I already owned a metal mounted warlord and four mounted Teulu for my Welsh, but they were mounted on the smaller welsh cobs. For the rest of the warband I used three of GB's plastic Dark Age warriors boxes which come with modern horses. Unwilling to have my warlord and his hearthguard ride into battle on ponies while his warriors spurred on their chargers I felt a little mount swap was required. I was sad to lose the accuracy, but worth it for a unified warband. They didn't fit very well and needed their legs splaying into position in an operation that looked extremely uncomfortable, but I think they're in a place where they don't look too out of place with the others.


I tried a few new things on these. For the horses, I removed a step of highlighting. The reigns didn't get highlighted at all.This was in the interest of speed. I've always worried too much about getting things looking just right, and actually what I want is models on the table, not painting awards, so I'm continuing to cut back on things like this. Other shortcuts included using a citadel contrast paint for the flesh, which saved a lot of time, and not following the contours of the model but applying a loose zenithal highlighting technique (but without all the messing about with two types of primer). I think the individual models don't look as highly worked, but en-masse they look really good. This is something I am hoping to carry over into my next project (Saxons) but the Victrix models are more detailed than these fellows, so we'll see how it turns out.


Shields and banners are LBMS, tufts from Tajima1. The things that took so long on these were the spears. I am tired of plastic spears breaking, and they have a tendency to look like tree trunks on the Gripping Beast plastics, so each of these got his spear cut off and a hole drilled to take a wire spear. Again, I think this improves the look an awful lot, but I did get somewhat fed up of piercing my thumb tip with a tiny drill piece!
The bases were also an experiment. I have been struggling to get my bases looking the way I want, so after looking at a lot of images of bases that I admire online, I decided to cut out the flock and the static grass, and just opted for a range of tufts. Key to making this work was the 2mm tufts, which give scale, contrast, and structure to the larger tufts. In future I will lay in a bigger stock of 2mm tufts because I still felt there were too many of the larger sized tufts here. I also experimented with using cat litter to represent stones and gravel. A marvellous, if curious, choice. Again, I will be using this material as my go-to technique in future.


These chaps will be organised into three units of warriors and two units of hearthguard. in SAGA Strathclyde levy cannot be mounted and must carry javelins, not bows, which sacrifice a lot of range. I'm not keen, therefore, on having a foot element to this warband, especially as they can activate the whole warband using just two SAGA die. I have enough spare models to round out the two units of hearthguard into warrior units, but I don't have enough space in my storage foam for another 8, so I'll see how they fare on the battlefield before buying more storage. 

I also hope to use these in various guises in Hail Caesar, or other larger games as well. It has already been pointed out that I am well on my way to having enough for Gododdin, but I'm not convinced my thumb could cope with being pierced another 257 times for a 1:1 recreation.

I'll leave you with another couple of photos of the whole lot. I'm glad these have turned out better than the Germans in the last post. I was starting to fear that I had lost the touch!


Friday, 24 April 2020

Book Review -- Viking Britain; A History - Thomas Williams

Viking Britain: A History: Amazon.co.uk: Thomas Williams ...


Just a quick review for this one. Enjoyed it, and whipped through it fairly quickly. Williams has a interesting style. Many of the amazon reviews for this bemoan his tendency towards colourful, fictionalized prose rather than a dry academic style. While admittedly in the first chapter this is a touch overwrought, it's actually a style that helps make the book more readable than many other popular history offerings. It is also described as a 'narrative history', so, frankly, what did the reviewers expect?

Another strength of this book is placing the various phases of Viking invasion/colonization within a cultural context. Thomas is extremely strong when showing the interaction between Norse and Anglo-Saxon cultures, and tracing the roots of ideas back to their origins. This book is perhaps as much sociological as it is historical as it is narrative.

If you are looking for a dry who did what where and when, this isn't for you. If you are however, interested in getting close to the Viking and Anglo-Saxon view of the world, a world heavy with local myth, and replete with death, then this book is extremely evocative.

Overall, I feel that the original (alternative?) title I have seen this book under- 'Viking Britain: an exploration' is a lot more accurate, and would perhaps draw less ire from those simply looking for an enhanced timeline in prose form.

In terms of wargaming, the emphasis in this text on the fact that Anglo-Saxons would repeatedly choose symbolic sites, such as those replete with megaliths, as sites for battles will influence my Saga tables with a lot more fights occurring around barrows and undulating landscapes. Likewise, the brief descriptions of the problems with siege craft in the era is one that needs thinking about, and explains why the 'Protect the Burgh' scenario from Age of the Wolf was less interesting than it perhaps should have been.

Friday, 3 April 2020

Finishing options for platoons.

I had a nicely preserved copy of Warhammer English Civil War turn up in the post yesterday, which made for some fun evening reading, and I'm starting to feel that cracking on with the ECW stuff is not too far off. Just need to finish off my ww2 starter platoons, Update my Saga collection for Version 2 (and possibly increase it in size until me and my wargaming chum can play a game of shieldwall), and build a bit more scenery. So 'not too far off' in this case is hopefully by the end of the year, realistically in a couple of years' time!

Back to the present, though. I'm initially collecting these ww2 forces for Bolt Action, on the basis that you need a lot more stuff for that game than for Chain of Command. I'm more keen on the latter game, but BA is nice and easy for casual play. I've been using the Normandy force selectors to start off with.

I'm planning on two separate German forces, a Heer platoon and an SS platoon. At the moment I have two squads from each and they mix happily to make a Bolt Action army, but I'm aware that I should paint up the full requirement of each for CoC. That said, I've nearly finished some support elements for the SS. The Normandy selector allows for 2 machine gun teams and a mortar. These have not come out as good as I'd hoped, and I'm not sure if it is varnish issues, or in some cases the patchy quality of some of the sculpts. Either way, I'm calling them done apart from adding some more vegetation. I'm going to have to wait until after the current crisis is over to get my hands on some, though.

Also, please forgive the quality of the photography. It's hard to set up a light box with a 4 year old running around the house!


I'm really not pleased with how these came out in the slightest.

On top of these, I have also managed to finish off the final elements of the British Platoon:


Not my best work, particularly in terms of the Germans, but I'm calling them done anyway. I'm pleased that I have actually finished a complete British army with all options (apart from all the available tanks, but I dislike painting tanks, so a couple will have to suffice.

I'm looking forward to my Gripping Beast delivery arriving. I have more SS metals to do, but after the state of these, I'd really like to move on to some Dark Ages for a little break.

Friday, 27 March 2020

Sarissa precision Horsa glider

Unfortunately, having a 3 three year old in the house, and having to work from home (I'm a teacher) isn't giving me quite the time that other people seem to have to work on their hobby during the coronavirus lockdown, but actually, I'm OK with that. If I was doing it all day every day I would burn out! That said, I do have a few updates that I should have been putting on here, so now is a good time to do so.

My first one is putting together a horsa glider for a British airborne force for Bolt Action, or maybe Chain of Command if I ever get around to buying the rulebook...

The glider itself is the 1/56 MDF and card kit from Sarissa Precision. I approached this with no small level of trepidation, as I find MDF kits need quite a bit of working to get them looking good, and this was by far the most complicated laser-cut kit that I have tackled.
And indeed, it was tricky, but not overly so. I have been using Roket card glue to put it together rather than PVA, and I think this has been a lifesaver. If I had had to brace things while waiting for PVA I may have lost it and just binned the damn thing altogether.

First you assemble to cockpit, and then the main fuselage of the glider begins with putting support rings around a central floor.


I made a couple of slight mistakes, both made by not paying attention to the precise order of the instructions. My advice for this kit is to do things in exactly the order you are instructed to! I have to chop a piece off the central support for the cockpit, and prise apart the second from top fuselage ring in the picture above as the lugs didn't line up. Thankfully neither of these issues were sufficient to screw the build up entirely.


The door was another tricky moment, and required pulling apart. Due to the way the hinges work, you need to assemble it attached to the fuselage. Again though, not the end of the world.
My biggest bugbear with the kit, however, is the score marks in the skin. It's an impressive piece of design work, but I definitely did not want those lines across the finished model. So, I did a little research and took an idea from the chap over at wargamesandrailroads (whose Horsa build can be found here) and covered the bugger in diall pre-mixed filler.


I applied it as smoothly as I could with my finger, and then sanded it down with some fine grit sandpaper... and it's not come out too bad. Fairly smooth, and I think I applied it thick enough that I didn't end up sanding the card itself.  I've chucked on some Galeria black acrylic paint as that filler would have just soaked up spray primer;


and I think she's looking fairly sexy. There was a huge gap between the wings and the fuselage, so I've filled that in too, but at the expense of being able to fully disassemble the model. This is going to be a sod to store now, but a good looking model > storeability in my opinion.

I still need to detail the interior of the ramp a little, and maybe make some extensions so the ramp comes down the floor, but other than that I think she's ready to take some paint! This has gone on the backburner for the moment, though, as I need to get some masking tape, and bottles of the right colours, so in the meantime I have been painting up the finishing models for my British force, and the non-rank and file elements of the Germans.
My next post will be showing off the brits, and I'll wait until I have something more interesting than rank and file for the Germans before I post them up.
I also have plans in the works for a dark ages pallisade and Strathclyde Welsh warband for Saga, so plenty to keep me occupied while the world is going to hell!

Friday, 28 February 2020

Saga Vikings v. Welsh AAR.

First post about an actual game rather than modelling or reference materials. This might resemble a proper wargaming blog at some point.

This here was a game played using SAGA version 1 rules (because it's what we had to hand) with 'The Challenge' scenario. Only I failed to read the wound special rule for the warlords, so it turned into something else. Oh well. You live and you learn.

Here's the board at the start of the game. I think my scenery is finally starting to take shape. Still a long way to go, and the mat hides a multitude of sins, but I was pleased with how the game looked, and the preponderance of terrain elements definitely helped the game.


I was playing Vikings on the right, and good friend Chris was the Welsh, defending his home turf from the marauding invaders. A challenge had been given, in the hopes that the Welsh warlord could save the deaths of his wards in single combat.

The armies waited in the wings. The vikings with two units of warriors, two units of hearthguard, one unit of berzerkers, and a unit of levy with bows.

The viking line, including bright bag of cheesy snacks that I forgot to crop out.


Ranged opposite: the forces of the Welsh. Two units of javelin armed warriors, one mob of levy with slings, two units of hearthguard, and one unit of loyal hearthguard retainers mounted on small Welsh
ponies.


The challenge was accepted, and the Viking warlord was struck to the ground.

Where's he gone?


Yes, this shouldn't have happened, but it set the stage for the conflict. Determined to retrieve their warlord's body, and maybe enact some vengeance upon the Welsh, the Vikings surged forward and formed a shieldwall, ready to push into the center of the village and reclaim some semblance of 
honour or die in the attempt.

The Vikings retain their discipline despite the early loss of their warlord.


The Welsh pushed forward on their left flank hoping to roll up the Viking line swiftly, while their  warlord retreated to the safety of his unit of hearthguard and laid in ambush behind a hut, along with a unit of warriors.


The Welsh left, with Hearthguard pushing forwards to disrupt the Viking line supported by javelin throwing Warriors.

After a brief tussle in the field to the north, the vikings push into the center of the village to occupy the ground where their leader lay felled.


Sensing his moment, the Welsh warlord led a charge into the closest unit of warriors and drove them back.


In the thick of it, the battle-hardened Vikings knew what to do. They sent wave after wave of warriors against the warlord and his unit of hearthguard. The brave Welsh fought off every single attack until the warlord stood alone, exhausted. At this point their came a blood curdling cry as the berzerkers finally became incensed by the sight of so much bloodshed. They sprang forwards and tore the Welsh warlord to shreds. Vengeance had been exacted.


Stunned by the ferocity of the wild northmen the Welsh could only pick at the edges of the Viking force as the berzerkers changed tack and charged north into the teeth of the Welsh attack, taking on another unit of hearthguard and wiping them out entirely, before finally overreaching themselves and falling to a fresh unit of Welsh warriors.


Their most potent warriors gone, the vikings held on for several more rounds, until they were finally overwhelmed by the Welsh javelins. The levy archers, still in shock at the death of the warlord and unable to do anything except cower behind a haycart for the entire fight, finally slunk off to find either their longboats, or death at the hands of vengeful villagers in the depth of the Welsh countryside.


A good time was had by all, and probably the most fun I've had playing Saga. A few rules issues, but  it didn't detract from a good game, and in fact helped create a damn good narrative. This was the closest I have come to having the Vikings beat the Welsh, and this despite the early loss of two Saga dice for me in the early rounds. Fortunately I was mostly able to compensate for this by repeated use of the activation pool. It's convinced me I need to finally sort out my Norman force, and create a player guide sheet for Saga 2.

We also had our second ever game of Bolt Action following Saga, and again the terrain is starting to come together. The spree of field boundary making I have been on recently is paying off, but there's a lot further to go before I can produce a battlefield I'm proud of, so I'll only put one shot of it below, and not do an aar. We did find that playing from short board edges rather than long produced a somewhat more tactical game, so in future I think we'll be exploring this option, at least until I decide to pony up for the Chain of Command rules. I enjoy Bolt Action, and can see how, when one is in practice, it could play extremely quickly. However, I suspect that its lack of granularity may at some point become problematic.


Cheers.